
How to install soft stones
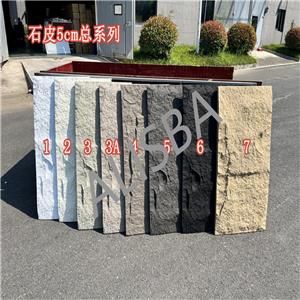
Soft stone usually refers to decorative stone products with relatively soft texture, light weight, and certain flexibility. Common examples include artificial soft cultural stone, etc. The installation method may vary slightly depending on the specific material and application scenario. Taking wall installation as an example, the general installation steps for soft stones are introduced below:
Installation preparation
Materials and tools: Confirm that the variety, specifications, color, etc. of the soft stone meet the design requirements, and inspect the soft stone for defects such as damage and cracks. Prepare materials and tools such as cement mortar, binder, grout, steel nails, plastic expansion pipes, hammers, drills, spatulas, level rulers, rulers, brushes, etc.
Grassroots treatment: The surface of the base layer for installing soft stones should be flat, solid, dry, and free of impurities such as oil stains and dust. For uneven walls, leveling treatment is required, which can be repaired and leveled using cement mortar or putty to ensure that the flatness error of the base layer does not exceed 5 millimeters. If the base layer is made of wood or other materials, it should be ensured to be firm and undergo anti-corrosion treatment.
Bullet line positioning
According to the design layout, pop up horizontal and vertical control lines on the wall. Horizontal control lines are used to ensure the levelness of soft rock installation, while vertical control lines ensure the verticality of soft rock installation. The snap line should be clear and accurate, and the spacing should be reasonably determined according to the size of the soft stone and installation requirements, generally not exceeding 1 meter, to facilitate calibration during subsequent installation.
Pre arrangement and cutting
Pre arrangement: Before formal installation, pre arrange the soft stones on the wall, observe the overall effect, check whether the color and texture of the soft stones are coordinated and consistent, and determine the specific position of each soft stone. Minimize cutting and ensure the continuity of the pattern and texture.
Cutting: Cut the soft stones according to the wall size and layout requirements. Use a specialized stone cutting machine or art knife (for softer parts of soft stone) for cutting operations. Pay attention to safety when cutting, ensure accurate cutting dimensions, and try to make the incision as smooth as possible.
Adhesive installation
Applying adhesive: There are two common ways of bonding. If cement mortar is used for bonding, mix the cement mortar evenly and apply a layer of about 10-15 millimeters thickness evenly on the back of the soft stone with a spatula; If a special adhesive is used, mix it according to the product instructions, and then use a toothed scraper to evenly apply it on the back of the soft stone. The thickness depends on the adhesive requirements, usually 3-5 millimeters.
Installation on the wall: Accurately stick the soft stone coated with adhesive onto the wall according to the pre marked control line and pre arranged position, gently press it to ensure that the soft stone is fully attached to the wall, and use a ruler and level to check the flatness and verticality of the soft stone to ensure accurate installation position. For larger sized soft stones, it may require two people to cooperate in installation to ensure the installation effect.
Fixed reinforcement (optional)
To ensure the firm installation of soft stones, especially in areas that are easily impacted by external forces or on the exterior walls of high-rise buildings, additional fixing measures can be taken. Use an electric drill to drill holes in the appropriate position on the soft rock, then insert a plastic expansion tube and fix the soft rock to the wall with steel nails. The quantity and position of steel nails should be reasonably determined according to the size and weight of the soft stone, and generally each piece of soft stone should have no less than 2-3 fixing points.
Joint filling treatment
After the installation of all soft stones is completed, fill the gaps between them. Firstly, clean the debris in the gap to ensure that it is clean and dry. Then mix the grout with water to a suitable consistency, and use a grout gun or spatula to fill the gaps with grout. The filling depth should be slightly lower than the surface of the soft stone, usually 3-5 millimeters. After filling the joint, use tools to compact and smooth the surface of the joint filler to make the gap uniform and beautiful.
Cleaning and maintenance
Cleaning: Use a clean damp cloth or sponge to promptly clean the remaining adhesive, sealant, and other stains on the surface of the soft stone, to avoid difficult cleaning after the stains dry and affect the appearance of the soft stone.
Maintenance: After filling the joints, carry out maintenance according to the product requirements of the joint filler and adhesive. In general, keep the joint filling area moist, avoid direct sunlight and wind, and maintain it for no less than 2-3 days to ensure that the joint filler and adhesive are fully cured, ensuring the firmness and durability of the soft stone installation.
