- carbon crystal panel
- artificial stone
- Stone plastic wall panel
- Fish Bone Laminate Flooring
- self-adhesion wall sticker
- herringbone Floor
- High customer satisfaction: High quality products win praise
- About rhe SPC Flooring
- About Soft Stone Products
- Have a good news
- News from wall panels
- Industry news
Herringbone Size:606*101mm
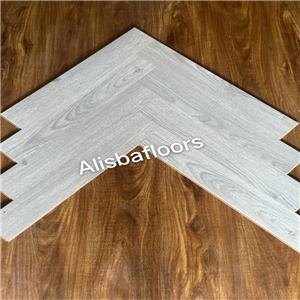
Herringbone floor - Size: 606x101mm
The Herringbone floor , with its distinctive zigzag arrangement, adds a timeless elegance and visual interest to any space. When considering this layout for your flooring project using planks measuring 606mm by 101mm (approximately 23.86" x 4"), here are some key aspects to ensure a successful installation:
Preparation
Accurate Measurement: Precisely measure the room dimensions to calculate how many planks you will need, including an extra allowance of around 10% for cuts and adjustments.
Subfloor Inspection: Ensure the subfloor is clean, dry, and level. Use self-leveling compound if necessary.
Planning
Dry Layout: Perform a trial run without adhesive to check the alignment and orientation of the herringbone pattern.
Start Point Selection: Decide where to begin based on the most visible area, typically near the entrance or under a light source.
Installation
Cutting Precision: Use sharp tools to cut the planks accurately, especially when forming the V-shape edges.
Stagger Joints: Stagger joints between rows to avoid creating long straight lines that can detract from the design's aesthetic appeal.
Adhesive Application: Apply adhesive evenly to the backside of each plank before pressing it into place.
Finishing Touches
Thresholds & Molding: Install threshold strips at doorways and use baseboards or quarter-round moldings against walls to finish off the look.
Careful Inspection: Regularly check during installation to confirm proper alignment and adjust as needed.
Maintenance
Cleaning: Wipe up spills immediately to prevent staining or warping.
Regular Dusting: Use a soft broom or vacuum cleaner regularly to keep dust and dirt from scratching the surface.
Choosing the right adhesive and ensuring correct installation techniques are crucial for achieving a seamless appearance with your herringbone flooring. This pattern requires more planning and precision than traditional layouts but offers unparalleled style and sophistication once completed.


