
- carbon crystal panel
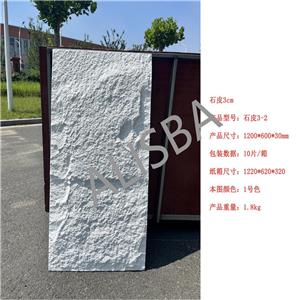
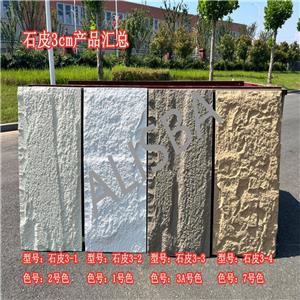
- artificial stone
- Stone plastic wall panel
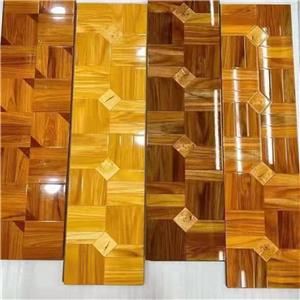
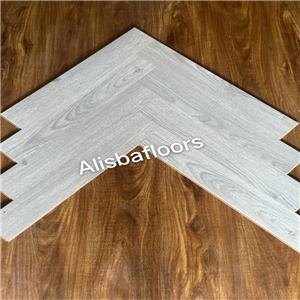
- Fish Bone Laminate Flooring
- self-adhesion wall sticker
- herringbone Floor
- High customer satisfaction: High quality products win praise
- About rhe SPC Flooring
- About Soft Stone Products
- Have a good news
- News from wall panels
- Industry news
What is the general installation sequence for Acoustic wall panel
The installation sequence of sound-absorbing wall panels is crucial for ensuring installation efficiency and the final acoustic effect. The following is a basic installation sequence guide, and the specific steps may be adjusted according to the type of wall panel, wall conditions, and specific design requirements:
1.preparation:
Ensure that all tools and materials are fully prepared.
Clean the wall surface to ensure it is dry, flat, and dust-free.
Mark the locations of power sockets, switches, and other obstacles to avoid installing wall panels in these areas.
2.Measurement and Planning:
Measure the dimensions of the wall and plan the layout of the wall panels.
Calculate the required number of wall panels based on their size and layout.
3.Installation bracket or keel (if required):
Install metal or wooden keels on the wall to provide support for the sound-absorbing wall panels. Ensure that the keel is level and firm.
The distance between the keels should match the size of the wall panels to ensure accurate installation.
4.Wall panel installation:
Starting from the top or most prominent position: It is usually recommended to install from the top or most prominent position of the wall to ensure the best visual effect.
Gradually install downwards: When installing the next wall panel, make sure it aligns with the previous one to avoid misalignment.
Fix with screws or specialized adhesive: Depending on the type of wall panel, use screws or specialized sound-absorbing wall panel adhesive to fix the wall panel to the keel or wall surface.
Dealing with edges and corners: For corners and edges, it may be necessary to cut the wall panels to fit, ensuring that the edges are neat and seamless.
5.Gap and detail treatment:
Fill the gaps between the wall panels with acoustic sealant to improve the sound absorption effect.
For gaps between wall panels and walls or ceilings, use sealing strips or additional sealant for treatment.
6.Final inspection:
After installation, check if each wall panel is secure and ensure that all gaps have been properly addressed.
Conduct acoustic testing to verify whether the acoustic effect after installation meets expectations.
7.Clean up the site:
Remove all garbage and debris generated during the installation process and keep the site clean.
Following the above installation sequence can ensure that the installation of sound-absorbing wall panels is both professional and efficient, ultimately achieving the desired acoustic improvement effect.

