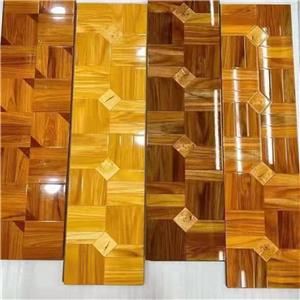
- carbon crystal panel
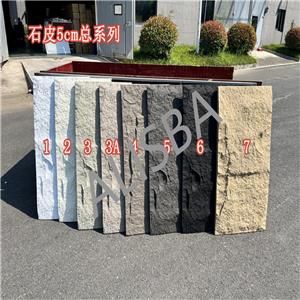
- artificial stone
- Stone plastic wall panel
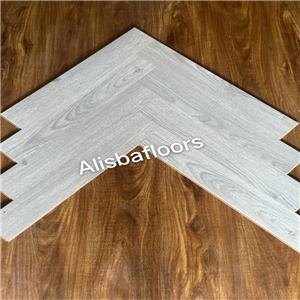
- Fish Bone Laminate Flooring
- self-adhesion wall sticker
- herringbone Floor
- High customer satisfaction: High quality products win praise
- About rhe SPC Flooring
- About Soft Stone Products
- Have a good news
- News from wall panels
- Industry news
How to install carbon crystal panel?
The installation process of carbon crystal panels may vary depending on the application scenario (wall or floor), but overall, it requires preparation, base treatment, and strict adherence to the installation steps. The following are the installation methods for carbon crystal panel walls and floors:
Installation of carbon crystal panel Wall Surface
preparation in advance
Materials and tools: Confirm that the model, specifications, and quantity of the carbon crystal board are correct, and prepare the supporting keel (light steel keel or wooden keel), pendant, sealant, foam adhesive, and other auxiliary materials. At the same time, prepare installation tools such as electric drills, chainsaws, level gauges, tape measures, and air nail guns.
Check the wall: Check if the wall is flat, dry, and free of cracks. If the wall surface is uneven with an error of more than 5mm, it needs to be leveled with cement mortar or putty first; If the wall is damp, moisture-proof treatment should be carried out, such as painting moisture-proof paint.
Install the keel
Bullet line positioning: Based on the size and installation plan of the carbon crystal panel, mark the installation position line of the keel on the wall to ensure that the keel is installed horizontally and vertically.
Fixed keel: If using light steel keel, drill holes with an electric drill and fix the keel to the wall with expansion bolts; If wooden keel is used, it needs to be treated with anti-corrosion and fireproof measures first, and then fixed to the wall with an air nail gun or expansion bolt. The spacing of the keel should be reasonably set according to the size of the carbon crystal plate, generally with a horizontal spacing of 300-600mm and a vertical spacing of 600-1000mm.
Board installation
Cutting panels: Cut carbon crystal panel with an electric saw according to the wall size and design requirements. When cutting, pay attention to accurate size and smooth incision.
Installation of panels: Hang the carbon crystal panel on the keel in sequence and fix them with hangers or self tapping screws. During the installation process, always use a spirit level to check the flatness of the boards, ensuring that the joints between adjacent boards are tight and flat. For the boards at the internal and external corners, a 45 ° chamfer treatment is required to ensure aesthetics.
Closing treatment: After the installation of the carbon crystal panel is completed, the edges of the wall, door and window openings, and other parts are closed. Special closing lines can be used to fix them in the corresponding position with glue or nails, making the entire wall more beautiful and tidy.
Ground installation of carbon crystal panels
preparation in advance
Materials and tools: In addition to carbon crystal panel, prepare ground self leveling materials, moisture-proof pads, special adhesives (if adhesive installation is used), skirting boards, etc. Tools include grinders, scrapers, rollers, rubber hammers, etc.
Ground treatment: Remove debris and dust from the ground to ensure it is clean and dry. If the ground is uneven, it needs to be polished and leveled with a grinder; For areas with hollow or cracked ground, repair treatment should be carried out.
Laying moisture-proof pad (optional): If the ground humidity is high, a layer of moisture-proof pad should be laid first. Lay the moisture-proof pads flat on the ground, paying attention to overlapping them with a width of not less than 100mm, and seal the interface with tape to prevent water vapor infiltration.
Board installation
Suspended laying: This is a common installation method. Arrange the carbon crystal panel on the ground in order according to the design pattern, and tightly connect adjacent plates through a locking structure. During the laying process, it is important to ensure that the direction of the boards is consistent. After laying a few boards, gently tap them with a rubber hammer to make the locking buckle more tightly connected. When encountering corners or obstacles, it is necessary to cut the board, and the length of the cut board should not be less than 200mm to ensure the stability of the splicing.
Adhesive laying: Apply specialized adhesive evenly on the ground, use a scraper to scrape the adhesive flat, and ensure that the adhesive is evenly applied and of consistent thickness. Lay the carbon crystal plates one by one on the adhesive coated ground in order, and gently tap them with a rubber hammer to ensure that the plates are fully adhered to the ground and the air is expelled. Be careful not to move the board before the glue dries.
Edge processing
Install skirting board: After the carbon crystal board is laid, install the skirting board. Fix the skirting board on the wall, leaving a suitable gap between the skirting board and the ground to accommodate the expansion and contraction of the floor.
Cleaning and inspection: Clean up debris and excess glue on the ground, check the installation quality of carbon crystal panels, such as whether the joints are tight and the surface is flat. If there are any problems, adjust and repair them in a timely manner.


